#MastoArtStudy Exercise N06
Today we’re going to exercise shading from imagination. We’re going to go into detail on how light interacts with an object and take a look at some simple exercises with spheres. In the final exercise you’ll be shading a drawing I have made for you.
Shading a sphere
When shading an object, there are five aspects we have to consider:

- Highlight, 2. Value of the color, 3. Terminator, 4. Core of the shadow, 5. backlighting/reflection from nearby surfaces
1. The highlight
We often place this at the end. It is a strong spot of white where the core of the light source reflects directly towards the viewer. The colors surrounding the highlight are often quite high in their value as well, but this depends on the reflectivity of the object.
2. Value of the color
The more a surface is angled away from s light source, the lower its value becomes. On a box this shows itself as the top side being the lightest while the side in front being a bit darker, and the shadow side being the darkest. On a sphere or a cylinder, this translates to a gradual darkening of the value between the highlight and the terminator.
3. The Terminator
We exercised finding and placing the terminator in exercise number 4. On boxes with a strong line this is easier, but on round objects it is a bit more of a gradient. You’ll have to decide yourself where you want to place it and blur out the line from there. Remember that you shouldn’t blur it too much. Even on round objects, the shadow comes quite abruptly.
4. The core of the shadow
Directly behind the terminator is the core of the shadow. This is the darkest part of your shadow. Beyond, the shadow is lit up again by the backlighting, the reflections of nearby surfaces.
5. Backlighting/reflections from nearby surfaces
This is a very important part of the shadow, because if you include it, it helps ground your subject to the rest of the scene. It is that final touch that can really sell the sense of realism. In real life, light is constantly reflected by the objects around us. If you’re sitting with your back to a yellow wall, the shadow on your back will have a yellow tint. When two objects are close to another, you’ll see that the light side of the object behind casts a strong reflection on the shadow of the front object.
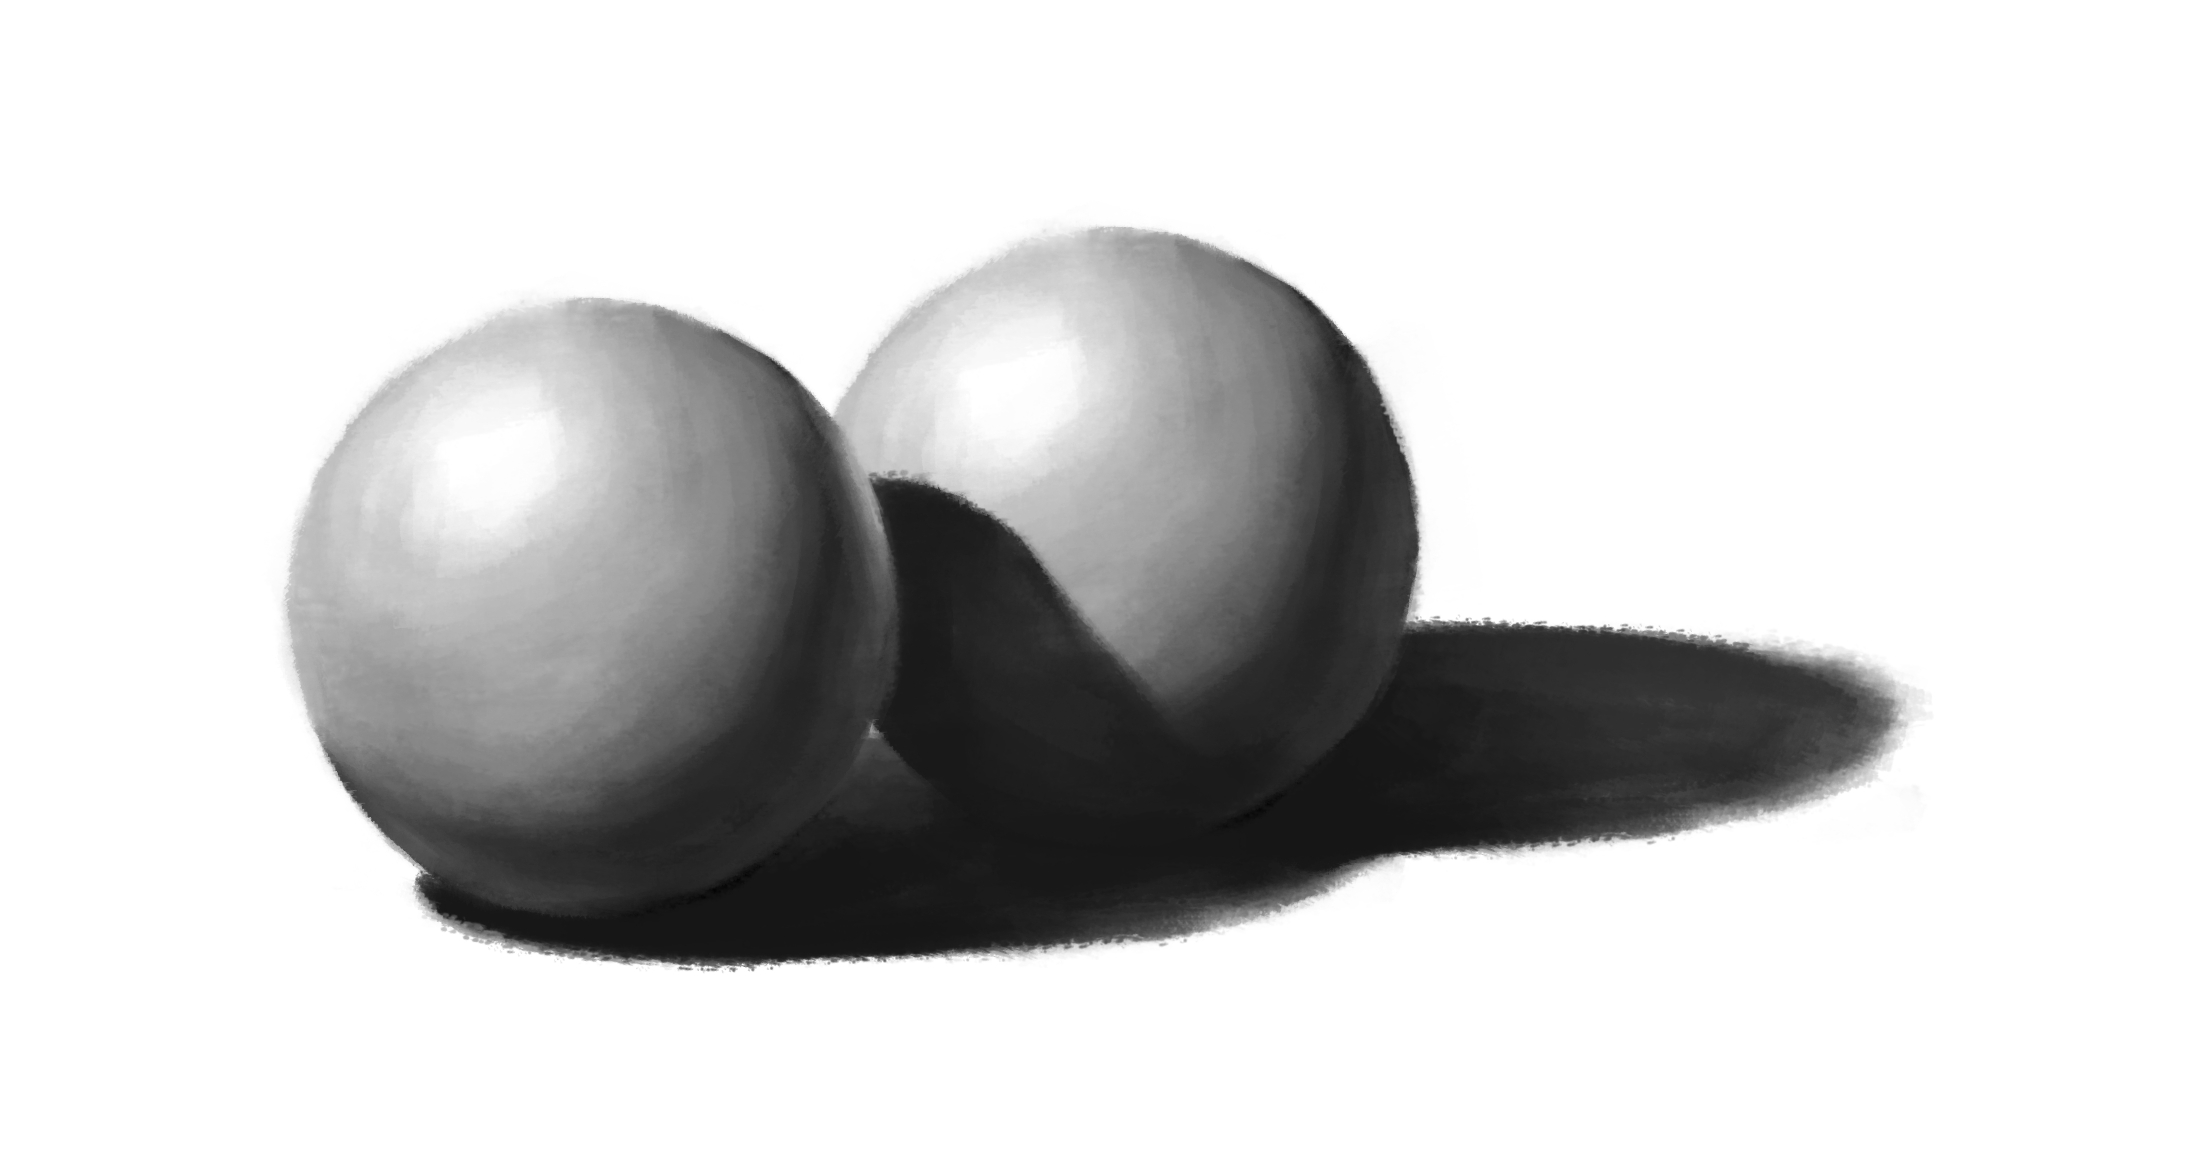
If you look closely at the shadow that is being cast on the ground, you can see that it is darkest closest to the sphere and becomes a little lighter the further it stretches out. This is because the reflected light of the environment is lighting up the surface underneath. Also notice how the edge of the shadow that is stretched furthest away becomes blurred. The closer the shadow is cast from the object to a surface, the sharper it is. Light diffuses when it travels longer distances which makes the shadow blurred.
Now the previous examples show directly lit objects, but when the light source is diffuse such as on overcast days, the lighting will come from every point straight above, weakening the shadow underneath.

When exercising this subject it is important to look at real life examples. Doing a study on a sphere is actually really helpful. It doesn’t have to be a marble though. Take an apple, an egg, a tomato, and see how light interacts with it.
If you have experience in using 3D software such as Blender, I can also recommend you using that to quickly set up a scene for lighting.
The exercise
So I got quite some different suggestions and you haven’t made it easy for me, and yourselves for that matter. I made a mix of all the suggestions and ended up with: a cat riding a dinosaur passing the caterpillar from Alice in Wonderland, sitting on a tree stump.

I want you to shade this picture. You can work in greyscale or color, that is up to you. You can decide where your lightsource is coming from. If you don’t want to make it too difficult for yourself I suggest you place the light source directly above.
The first step in shading is finding the rough shapes of the shadows, exactly as we did in the previous two exercises. Once you’re satisfied with how the shadows are cast, you can work on the details such as backlighting and highlights.
Deadline!
I’m going to give you two weeks to complete it, so tuesday the 28th of february. So good luck! I’m looking forward to seeing your shaded version of my drawing!
Giving and receiving constructive feedback
Now a big point of #MastoArtStudy is giving each other constructive feedback. This does not mean bashing somebody over the head with what they did wrong, but rather pointing out what the artist did right in the drawing and pointing out the area’s where the artist could improve. Now when receiving constructive feedback, don’t take it personally. The feedback is meant to help you improve. We all have to improve, that’s why we’re doing these studies. So try to refrain from making excuses or explanations for the area’s other artists point out where you should improve, listen and set goals for your next drawing based on the feedback you’ve received.
If you really don’t want to receive feedback, but you still want to share your exercise sketch using the #MastoArtStudyNumber6 hashtag, then please write No feedback in your post.
Now with that said, good luck everyone and see you in two weeks!